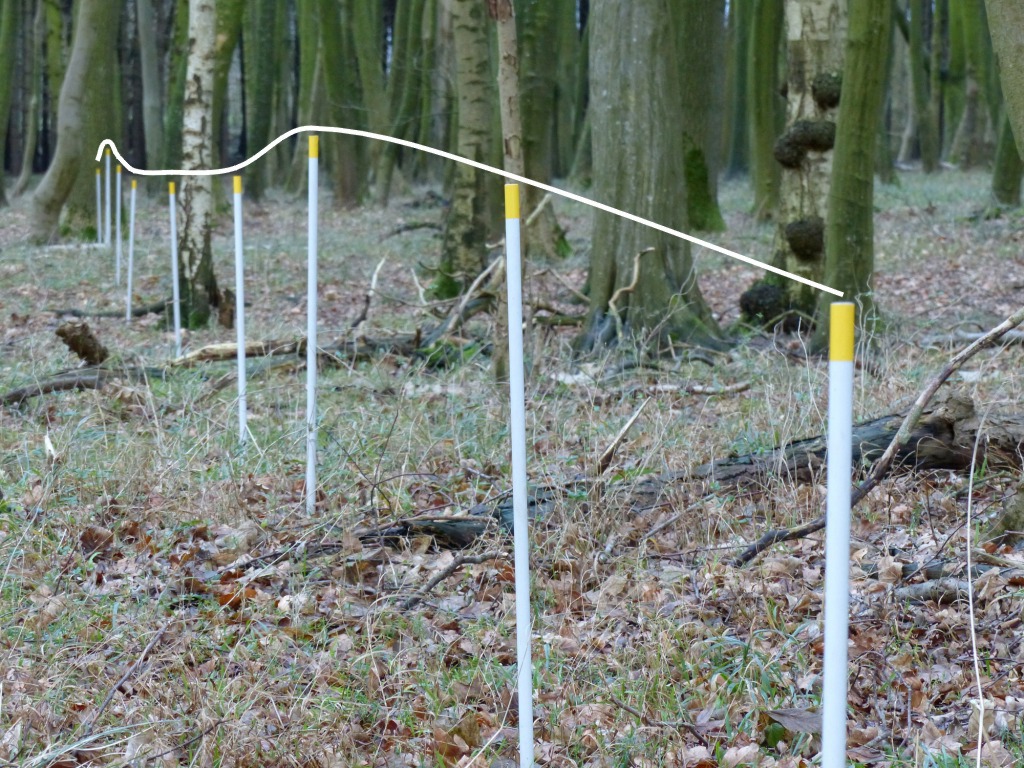
Alignment of poles through two rim walls and a plot (connecting line displayed). Odderade, Dithmarschen
'Celtic Fields' – Archaeology's stepchildren
Traces of prehistoric farming in Western,
Central, Eastern and Northern Europe:
Finding ‚Celtic Fields‘ in Forests
(Continue to
Sondages in ‚Celtic Fields‘)
Normally, the edge walls of plots in
forests are hardly recognisable without aids, especially if they are weakly
pronounced, if there is a lot of undergrowth or much forest waste. Exceptions
are clear terraces on slopes, which can best be recognised by looking from
bottom to top. In more level locations, the marginal ridges are most easily
recognisable if they are strongly pronounced and they are located in a forest
that is free or poor of undergrowth, e.g. an mature beech forest or an older
spruce forest. Despite all this, it is always difficult to map the raines if you
do not have suitable laser data. Simple GPS devices or the GPS positioning of
smartphones are usually not sufficient for this in the forests, unless you have
ideal conditions: bare winter deciduous forest, dry and windless weather.
Another precondition for good GPS positioning in the forest is that the device
is turned on early, preferably in open country, in order to initiate satellite
positioning, which can often take a long time in the forest due to the many
obstructing branches.
For demonstrations and excursions, but also for the optimal placement of
soundings, a simple system is suitable that I adopted from the archaeobotanist
Walter Dörfler, Kiel. For this you need at least 10 poles of the same length,
which have similar markings at the top that are easily visible even in dark
forest, and markings at the bottom, about 10 cm above the bottom end of each
pole. Then lay an alignment across a recognised or suspected field ridge, always
sticking the poles into the ground at the same distance up to the lower mark. Of
course, no tree trunk should be in the way. The distance between the poles is
not important, about 4 m has proven to be useful. If you then look from one end
of the alignment over the marked upper ends of the poles, field margins of 10 m
width and only 10 cm height can still be easily recognised. If the distances are
too large, you can add more poles to the alignment. This method also works with
strong undergrowth if the poles only overhang it.
Alignment of poles through two rim walls and a plot
(connecting line displayed). Odderade, Dithmarschen
It is much easier if you use a GPS-enabled
tablet or smartphone in which a map programme is installed, allowing to import
your own geo-referenced graphics, which are displayed together with your actual
location. Avenza Maps is a free app, which runs on both Apple and Android
devices. Locus Map is available for Android devices only. Both apps also
run in offline mode, which can be indispensable in remote forests. The
georeferenced raster data to convert a LIDAR dataset to must be loaded onto the
device in Geotiff or GeoPDF format for Avenza Maps, while Locus
Map only accepts raster data in KMZ format (Google Earth). For all
‚Celtic Fields‘ presented here, both data types are downloadable, and I am happy
to provide others on request if the needed laser data are of sufficient quality.
The following is a summary of the advantages and disadvantages of the
apps mentioned with regard to their use in searching for ‚Celtic Fields‘ (and
other archaeological ground monuments):
Avenza Maps: Free. Only loads up to three maps unless you buy the expensive full version. Easy to use, as only the most necessary functions are supported, but sufficient for the purpose mentioned. Setting points without problems. Caution: If you delete a map, any points set on it will also be deleted! They can be saved beforehand, but in a non-standard format, which can make it difficult or impossible to read them in later or use them in other programs. Be careful when editing points, they can easily be moved irretrievably!
Locus Map: Free with advertising, plus some ad-free paid versions. I prefer the cheapest paid version, which is completely sufficient for the purposes mentioned. The app seems a bit overloaded with its mass of functions, and if you handle it carelessly, you can very quickly get into unwanted windows. Loading your own raster data sets, and apparently as many as you like, is not done via "maps" but via "map items" in a separate folder and seems to be limited only by the storage capacity of the main memory. It is advisable to place a button for loading the "map items" permanently on the main screen via the settings. Points can be easily set and are permanently saved even if the corresponding map is deleted. However, I have problems loading the KMZs with version 4 - it works fine with the three versions.
Both apps also work offline. Locus Map provides offline maps based on Open Street Maps free of charge or at a low cost during installation, which can be helpful when getting there, because common navigation devices often do not show field and forest paths. Both apps allow both a north-oriented display and one in the direction of movement. The latter is not much use in forests, where reception conditions for GPS signals are poor on average, so I prefer the north-oriented display.
|
|
|
|
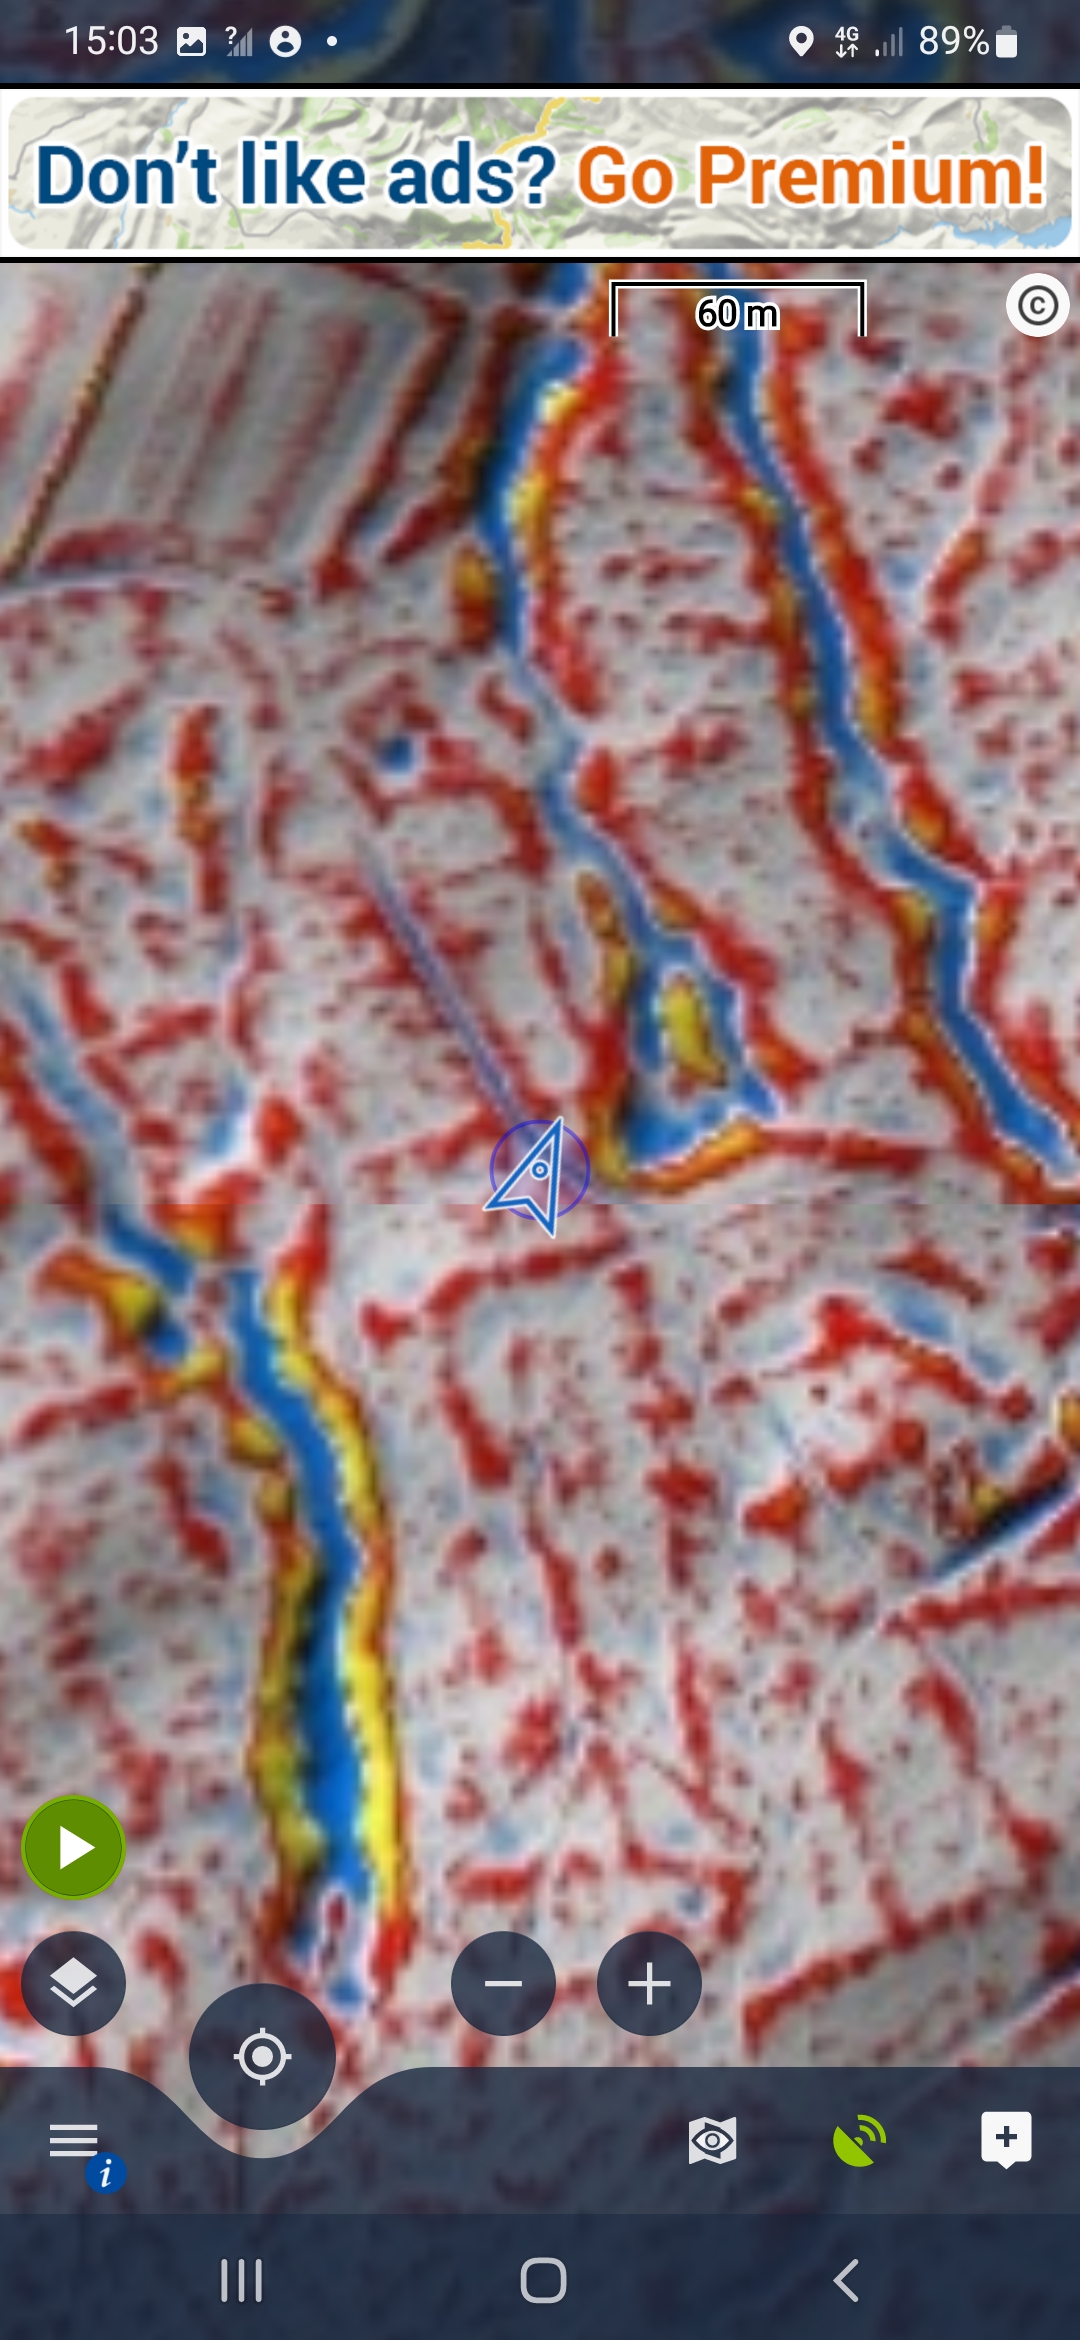
Screenshot of Locus Map (free version with advertising displayed at the top). The green antenna symbol at the bottom right indicates that satellite positioning is currently active. Then, a blue arrow is shown at the location surrounded by a blue circle indicating the uncertainty area. It is important that the Map Items icon is shown (here to the left of the antenna icon) so that you can show and hide the laser graphics. A short tip on the specially recessed button at the bottom left centres the graphic so that the location coincides with the cross in the centre of the screen. This must also always be done before marking a point, which is done by tapping the symbol with the cross at the bottom right. |
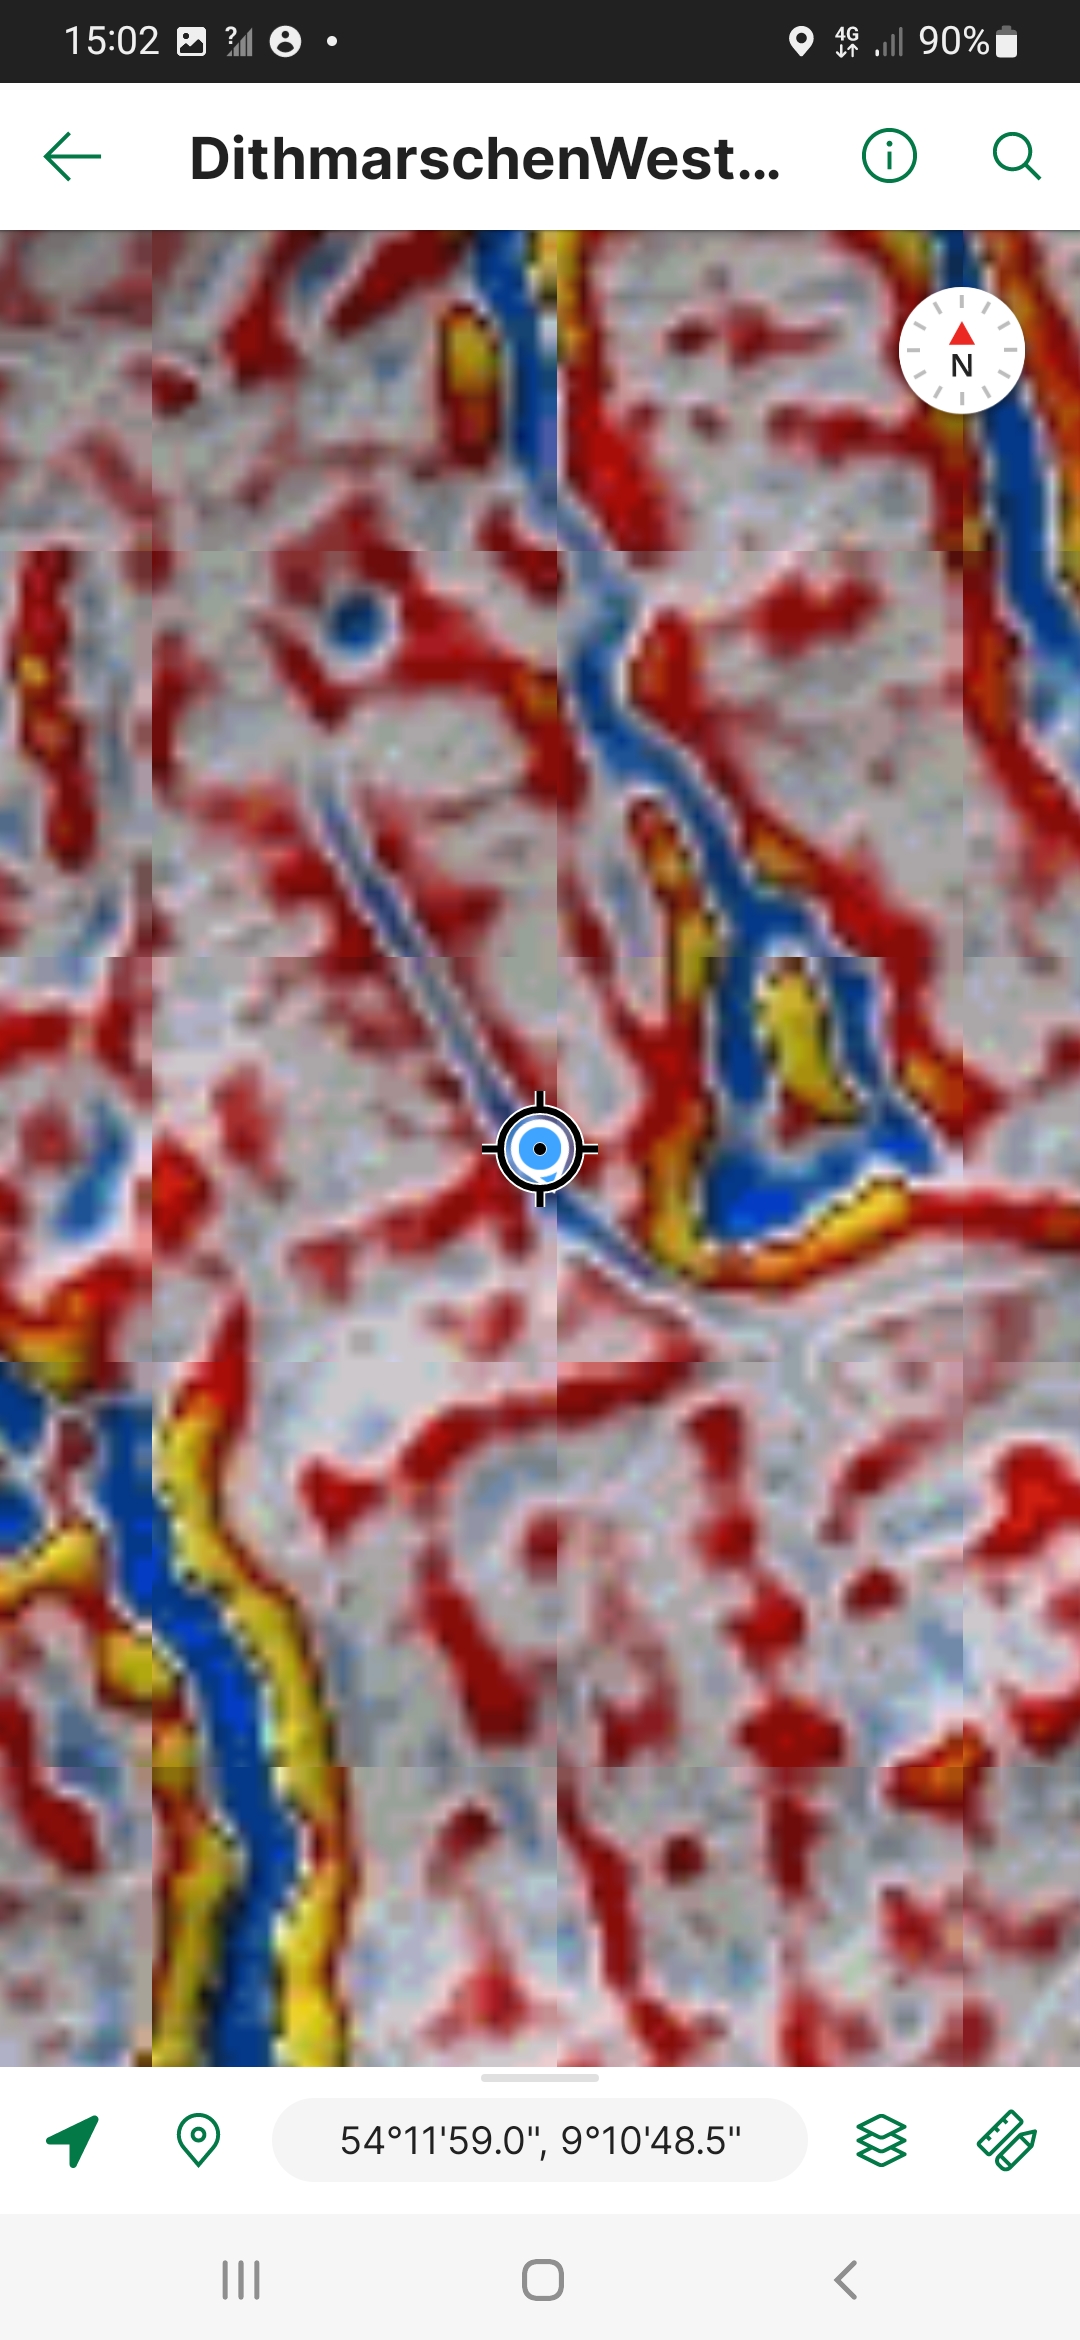
Screenshot of Avenza Maps (free version). Here the operation is clearer because of the sparse functions. Tapping the arrow at the bottom left centres the graphic on the determined location. A blue circle indicates the uncertainty area. Repeated tapping switches from north-up mode to compass mode, which normally makes little sense in the forest because of the unfavourable reception. Tapping again switches back to north-up mode. Once this has been done, a point can be set by tapping on the symbol to the right of it. Be careful when editing points: they can easily be moved irretrievably! The two symbols at the bottom right are not relevant here. |
Continue to Sondages in ‚Celtic Fields‘
Back © Volker Arnold 2022